Good Morning!
Today I am attempting my first tutorial and the super fun project is...
Tie Dyeing a t-shirt and since Mardi Gras is approaching fast, the colors I am using are Deep Purple, Forest Green, Bright Green, Palomino Gold, and Bright Yellow. I have found many different techniques to use but after dyeing over 1000 shirts and yards and yards of fabric, I have developed the best way for me and that is what I am going to demonstrate...My Way!
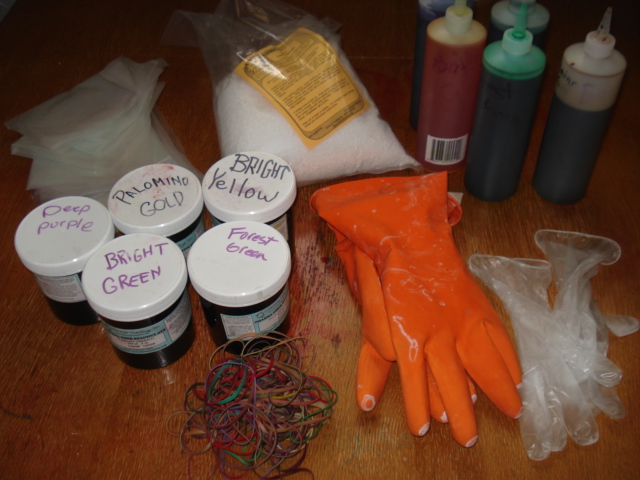
You will need the following
1. Dye ( we use Dharma Trading co. brand) follow the brands recipe and I highly recommend mixing the dye up the day before.
2.Urea to mix with the dye
3. Plastic squeeze bottles
4.Water
5.vinyl gloves
6.Rubber gloves
7.Rubber bands
8. Plastic sheeting cut into large squares
9. Lots of paper towels
10. Soda Ash
11. Funnel, tbsp.,tsp., 1 cup measuring cup.
12. 5 gallon bucket or a large bowl/bucket
13. 100% natural fiber shirts...cotton, hemp,bamboo, silk etc.

I thought I had taken a photo with everything you will need but I left out the paper towels,bucket, funnel,measuring spoons,and soda ash. So make sure you check the list above.

First you need to mix up your soda ash and warm water soak.
I use about 3 gallons of warm water for 10 to 15 shirts approx.,
The ratio is 1 cup soda ash to 1 gallon water. So if you have 3 gallons of water mix in 3 cups soda ash. Put on those rubber gloves, mix it up and immerse all the shirts in the water. Let them soak for at least an hour, I have left them in overnight and they are fine.

Put on those rubber gloves again and ring out the shirt you plan to dye first.

At this point you will need to put on the vinyl gloves and lay the shirt out flat on a clean table. You will need those rubber bands too...lots of them. about 8 to 10 per shirt.

Now there are many different wonderful ways to tie a shirt and create fabulous designs but today I am going to show you the simple "Swirl".

Pinch the shirt where you want the center of the swirl to be placed. I recommend a bit higher than center because no one wants a swirl right on their tummy. At least I don't. If you are going to be dyeing multiple shirts it may be best to "tie" them all up before you begin dyeing. You want to keep your work area clean while tying or you will get dye where you don't want it. Just don't let the shirts dry out.
OK...
Pinch and start to twist. As easy as that.

As you twist you need to guide the fabric with your other hand. The more folds you have the more detail you will have.

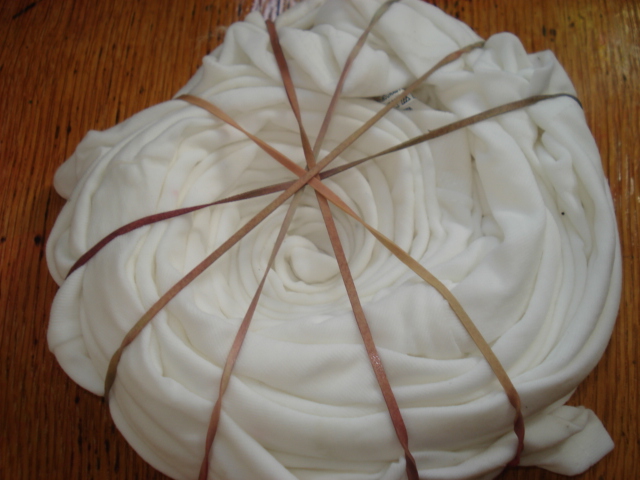
At this point just hold the center and wrap the rest of the shirt around.
Like this...

Now secure it with rubber bands like so...

Now comes the fun and sometimes unpredictable part, applying the dye.
I am not including how to mix the dye because different colors have different recipes and it would be best for you to follow the dye's instructions. If you have any trouble with the recipe just leave me a comment. I am happy to help.
Ok...so your dye is all mixed up and in squeeze bottles. I recommend the high quality bottles Dharma Trading Co. has opposed to the mustard/ketchup kitchen type bottle. I tried the condiment bottle initially and they leaked all over...major bummer.

Get those paper towels and lay your tied shirt on a piece of plastic sheeting.
So now start dyeing! To get a swirl shape you just think of it like a pie.
You can dye 3 pieces to the pie or 6 or whatever...3 pieces is the one I am doing today. So first I am starting with the green piece of pie.

Now you will need to keep those paper towels handy...real handy.
I am starting with Bright Green. Carefully squirt the dye into a pie shape from the center to the outer edge. Use your paper towel to wipe up any stray squirts or drops and the dye will run along those rubber bands and go where you don't want them, so dab the dye off the bands as you go.
Here is my first pie, first side.

Now you will think that you are putting too much dye on...so flip it over
and you will see it didn't even go through.

So add dye to the flip side. Like so...

Take a peek underneath at the first side and you will see it is now running all the way through.

So wipe the plastic off with the paper towel and flip the shirt over.

I am jumping ahead just a bit here... I have added Forest Green to both sides and Palomino Gold to the original side leaving some white between the bright green and Palomino Gold because I want to blend the gold and green together a bit with the Bright Yellow. It is good to keep in mind the colors that will be created when two colors meet. For instance if you use blue next to red than you may have purple where they touched. I have a very hard time with our Independence day shirts due to this.

Flip it over again, wiping the excess dye off the plastic with every flip.
Here I am adding the Palomino Gold to the flip side.

With this flip you can see I am starting to get a "muddy puddle". You need to try and keep this wiped up or the muddiness will soak into your shirt.

Add the Bright Yellow...oh yeah!

Muddy puddle alert!

Deep Purple is up next... first side...

Deep Purple flip side...

Ok now... you need to know the importance of achieving the "muddy puddle" or not. If you apply so little dye that you never actually create a puddle then you will have a lot more white showing than you may want. If you Super Soak it with dye you will have very little white showing on the end. It is really a matter of how much white/contrast you want. Just remember it will take more puddling than you think.
I have quite a puddle here with all the colors combined and I do not want the shirt to spend the night in a Muddy puddle.
So wipe and flip,wipe and flip,wipe and flip...

Until your shirt is only puddling about this much when it sits.

Wrap it up in the plastic sheet and secure with rubber bands.

Now when I make multiple shirts at once I lay them out on plastic on a industrial cookie sheet, not wrapped in plastic, to prevent puddling and washing all that plastic is not fun for me.
You will have no problem with them wrapped as long as you leave it laying flat, if the bundle is held sideways the dye will move and drip, you may end up with purple on your yellow which is nothing like chocolate in your peanut butter (remember that commercial?)
It is important that the shirt doesn't dry out and it will need to sit at least 8 hours but I leave mine overnight.
next post- How to Tie Dye pt. 2
Happy Day!










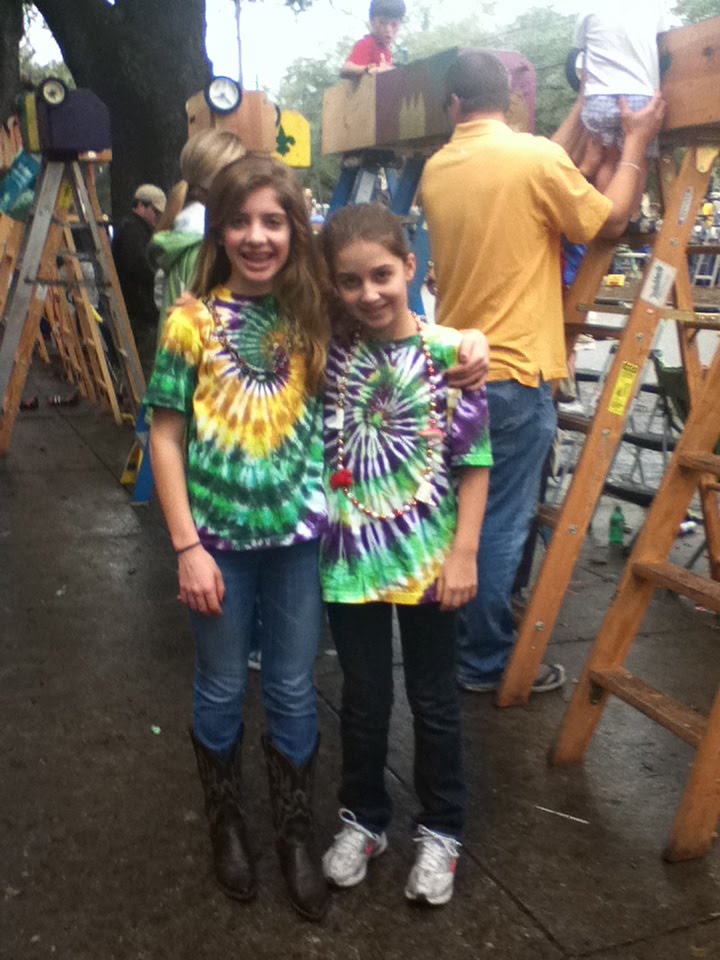

 Meet Savannah and
  OH my...
 they are too cute, way too cute!